A step by step guide from Evolved Plumbing
Key Takeaways
- Homes built before 1986 are more likely to have lead service lines, lead solder on copper pipes, or older brass fixtures that can leach lead.
- The fastest first check is to inspect the pipe that enters your home from the street. A dull gray pipe that is easy to scratch and does not attract a magnet is often lead.
- If you suspect lead, use only cold water for cooking and drinking, flush taps, and use a filter certified to remove lead while you plan a permanent fix.
- The most reliable way to know your risk is a combination of visual inspection and lab testing of your water.
- Evolved Plumbing can verify materials, test water, and replace lead lines with safe copper or approved plastic piping.
Introduction
Lead in drinking water is a health risk. It can affect brain development in children and can harm adults as well. The problem usually comes from lead pipes, lead solder, or older brass fixtures. You cannot see, taste, or smell lead in water. That is why a clear plan to check your plumbing is important.
This guide explains how to tell if your home may have lead pipes and what to do next. The steps use simple tools you may already own. When the checks call for a pro, we explain why and what it will cost you in time and effort. By the end, you will know how to spot warning signs and how to make your water safer.
For general health guidance, you can review these resources:
- U.S. Environmental Protection Agency: Lead in Drinking Water: https://www.epa.gov/lead/learn-about-lead-drinking-water
- Centers for Disease Control and Prevention: Lead and Health: https://www.cdc.gov/nceh/lead
- NSF Certifications for Water Filters: https://www.nsf.org/consumer-resources/water-quality/home-water-treatment
Step 1: Check the age and history of your home
Age matters. Lead service lines and lead solder were common in many places until 1986, when federal rules changed. Brass fixtures made before 2014 could also contain higher amounts of lead. If your home was built before 1986, or if your neighborhood has many older homes, take extra care with the next steps.
Look for records from your city or water utility. Many utilities now publish service-line maps or allow you to request the known material for your address. These records are not perfect, but they can give you a starting point.
Step 2: Find and inspect the service line inside the house
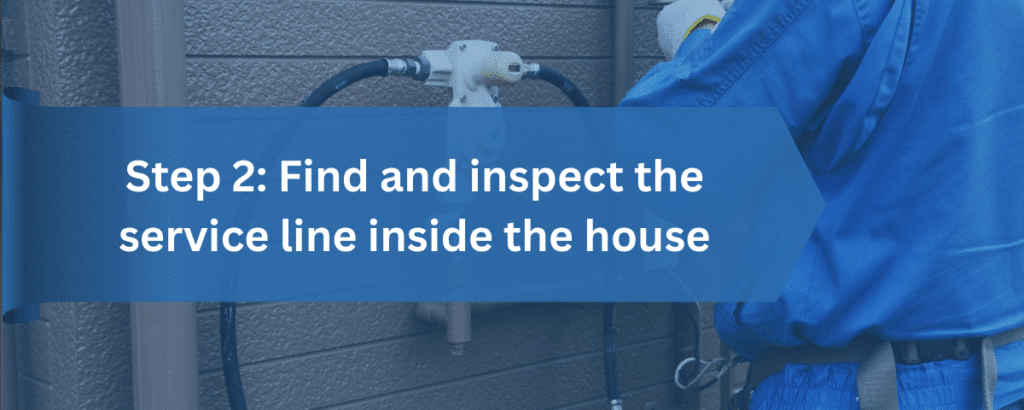
The service line is the pipe that brings water from the street into your home. You will usually find it where the pipe comes through the basement wall or floor and connects to the water meter or main shutoff valve.
Use the checks below:
- Color and feel
Lead is dull gray and soft. If you gently scrape it with a coin or key, the scratch turns shiny silver. Copper is orange-brown. Galvanized steel is silver but harder. - Magnet test
Hold a strong refrigerator magnet to the pipe. Lead and copper do not attract magnets. Galvanized steel does. This helps you tell steel from lead. - Shape and joints
Old lead pipes may have a curved “gooseneck” near the meter. Joints may look bulbous rather than sharp threaded connections. - Labels and transitions
Note where the material changes. Some homes have a short section of lead that transitions to copper or steel. Write down what you see for your records.
If you think you see lead, do not file, drill, or cut the pipe. Disturbing lead can release particles into your water. Take a photo and move to the next step.
Step 3: Inspect visible plumbing near sinks, water heater, and boiler
Lead can also enter water from solder used on copper pipes or from older brass fixtures.
- Solder
Before 1986, solder often contained lead. Look for dull, thick lines at copper joints. Modern solder looks more smooth and shiny. If your home has older copper piping, assume the solder could contain lead and consider testing. - Brass fixtures
Faucets, valves, and shutoffs made before 2014 may contain more lead. If you are not sure of the age, consider replacing them with products marked “lead-free” and certified to NSF/ANSI standards. - Galvanized steel
Old galvanized pipes can trap lead particles. Even if you no longer have lead pipes, old galvanized lines can release stored lead back into your water. If you see gray threaded steel pipes, put them on your list for replacement.
Step 4: Check the service line outside with care
Some homeowners want to know what the pipe looks like on the yard side. Many properties have a curb stop or valve box near the sidewalk. Opening and inspecting this area can be tricky and may require a special key or a permit. In many cities, this portion is owned by the utility. Contact your utility or Evolved Plumbing to do this safely. We can confirm materials without damaging your line or violating local rules.
Step 5: Test your water for lead the right way
Visual checks are helpful, but water testing gives you data. There are two common sample types:
- First draw sample
Let water sit in the pipes for at least 6 hours. Fill the bottle from the cold water tap without flushing. This shows the highest likely lead level in normal use. - Flushed sample
Run the cold tap for 3 to 5 minutes, then collect. This helps show whether lead is coming from the service line or from plumbing inside the home.
Use a certified lab or a test kit provided by your city. DIY strips for water are not reliable enough for final decisions. Your city or state health department can point you to certified labs. The EPA Safe Drinking Water Hotline can also help.
Keep a log of results with dates and sample locations. If the test shows lead at or above 15 parts per billion, take action now. Even lower levels can be a concern for children and pregnant people.

Step 6: Take immediate steps to reduce exposure
If you suspect lead, or if tests confirm it, use these steps right away:
- Use only cold water for drinking, cooking, and baby formula. Hot water dissolves more lead from pipes.
- Flush taps until the water turns cold and steady, especially after the water has been sitting.
- Use a filter that is certified for lead reduction under NSF/ANSI Standard 53 or NSF/ANSI Standard 58. Check the label and replace cartridges on time.
- Consider using bottled water for infant formula until a certified filter is installed.
- Clean faucet aerators. Grit can trap particles that may include lead.
These steps reduce risk while you plan a permanent solution.
Step 7: Plan the permanent fix
The safest long term solution is to remove lead sources.
- Replace the lead service line
This line can be on private property, the city side, or both. Full replacement removes the highest risk. Partial replacement can disturb pipe scale and can raise lead levels for a short time, so a full plan is best. Evolved Plumbing coordinates with utilities to replace the entire run when possible. - Replace galvanized steel that was downstream of lead
Old galvanized pipes hold onto lead. Replacing them prevents re-release of stored particles. - Replace old fixtures
Modern “lead-free” faucets and valves, certified to current standards, reduce risk from contact materials. - Consider point-of-use filtration
Even after replacement, many homeowners choose a certified filter at the kitchen sink as a final safeguard.
We can price several options, including trenchless methods that reduce yard damage. We also help with permits and inspections to keep work compliant.
What replacement means for your home
During service line replacement, water will be shut off for a short time. Expect noise from digging or boring. After work is complete, you should flush your plumbing with cold water. Run each tap for several minutes, then clean aerators again. Your city may offer a free follow up test. Evolved Plumbing can also provide post replacement testing for peace of mind.
Common myths about lead in water
- My water looks clear, so it must be safe.
Lead is invisible in water. Only testing can confirm safety. - I have copper pipes, so I am fine.
Older copper lines may have lead solder. Some homes with copper inside still have a lead service line outside. - Boiling removes lead.
Boiling does not remove lead. It can concentrate it by evaporating water. Use a certified filter or choose replacement. - Only very old homes have lead.
The risk is higher in older homes, but fixtures made before 2014 can still add lead in newer buildings.

When to call Evolved Plumbing
Call us if your home was built before 1986, if you see a dull gray soft pipe near the meter, if your water test shows any lead, or if you want a pro to confirm what you have. We perform material surveys, collect samples for lab testing, and handle full replacement from the curb to the meter and through the interior as needed. We also install NSF certified filters and lead-free fixtures.
Helpful links
- EPA Learn About Lead in Drinking Water: https://www.epa.gov/lead/learn-about-lead-drinking-water
- CDC Lead Information for Families: https://www.cdc.gov/nceh/lead
- NSF Certified Drinking Water Treatment Units for Lead Reduction: https://www.nsf.org/consumer-resources/water-quality/home-water-treatment
- EPA Consumer Tool for Lead in Drinking Water Testing: https://www.epa.gov/ground-water-and-drinking-water/how-find-information-about-lead-your-drinking-water
- State drinking water program directory: https://www.epa.gov/dwreginfo/drinking-water-offices
Frequently Asked Questions
How likely is it that my home has lead pipes?
Homes built before 1986 have a higher chance. The risk is even higher in older neighborhoods or where utilities used lead service lines. Newer homes can still have older fixtures or solder if they were remodeled with used parts.
Where should I look first?
Start at the main where water enters your home. Look near the meter or main shutoff. Then check visible lines to your kitchen, bathroom, and water heater.
Is a small amount of lead safe?
There is no known safe level of lead for children. The goal is to reduce it as much as possible. Use a certified filter and plan replacement if tests show any lead.
Do fridge filters remove lead?
Only if they are certified for lead reduction under NSF/ANSI 53 or 58. Check the label. Many simple taste and odor filters do not remove lead.
How much does replacement cost?
Costs vary by pipe length, soil, and access. Full replacement is an investment, but it protects health and can raise home value. We provide clear quotes after a site visit.
How long does replacement take?
Most jobs take one day for the service line, plus time to restore landscaping if digging is needed. Interior fixture changes take less time.
Should I test my water after replacement?
Yes. Post replacement testing confirms success and gives you a record for your home file.
What if I rent my home?
Talk with your landlord right away. Share any test results. Many cities require landlords to address lead risks. A certified filter can help while the owner arranges repairs.
Conclusion
Finding out whether your home has lead pipes does not need to be confusing. Check the age of your home, inspect the service line near the meter, review visible plumbing, and test the water through a certified lab. Use cold water, flush taps, and install a certified filter while you plan a permanent fix. The safest long term answer is to replace lead service lines, old galvanized steel, and outdated fixtures.
Evolved Plumbing is ready to help. We can verify your plumbing materials, test your water, explain your options, and complete a safe, code compliant replacement. Clean water begins with a clear plan. If you want a professional to take it from here, schedule an inspection with our team today.
